Background: This post will show you how to setup a home VPN using OpenVPN. There are many reasons why you might want to setup a home VPN such as privacy, access to region-specific content, etc… OpenVPN is free and both the client and server components we will setup support a variety of different configurations. The OpenVPN access server also comes with 2 free client connections that can be used for testing purposes (https://openvpn.net/index.php/access-server/pricing.html).
Pre-requisities:
- VMware vSphere (https://my.vmware.com/web/vmware/details?productId=491&downloadGroup=ESXI60U3)
- OpenVPN VMware Server Appliance (https://openvpn.net/index.php/access-server/download-openvpn-as-vm/469-deploying-openvpn-access-server-from-an-ovf-template-in-vmware-esxi-environment.html)
Steps:
Deploy OpenVPN Virtual Appliance
Download the OpenVPN VMware Server appliance at https://openvpn.net/index.php/access-server/download-openvpn-as-vm/469-deploying-openvpn-access-server-from-an-ovf-template-in-vmware-esxi-environment.html.
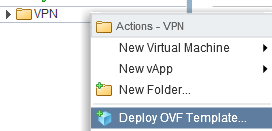
Log into your VMware environment and Deploy a new OVF template.
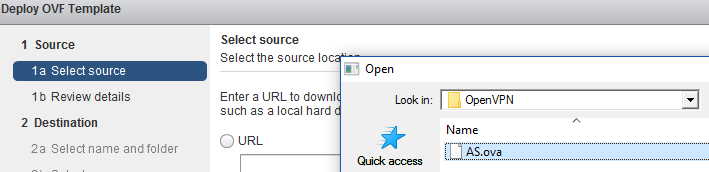
For the source, select the .ova file that you just downloaded from the OpenVPN website.
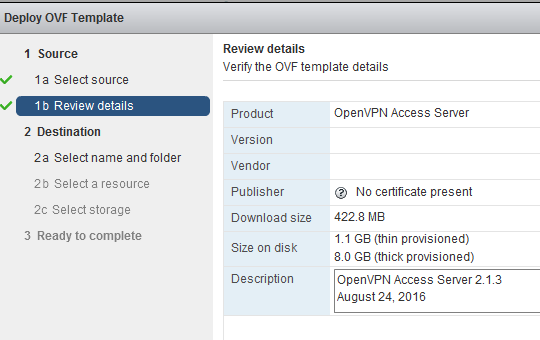
Review details such as description, size on disk, etc… Click Next.
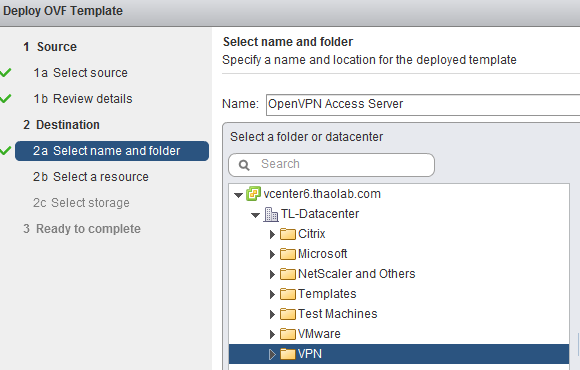
Name the appliance if desired. Choose a folder to place the appliance in for organizational purposes.
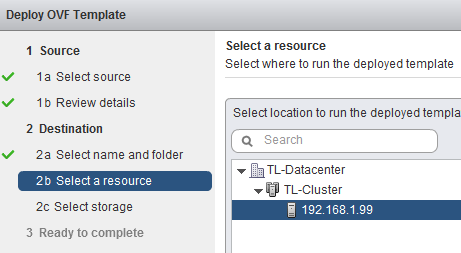
Select the host that will run the deployed template.
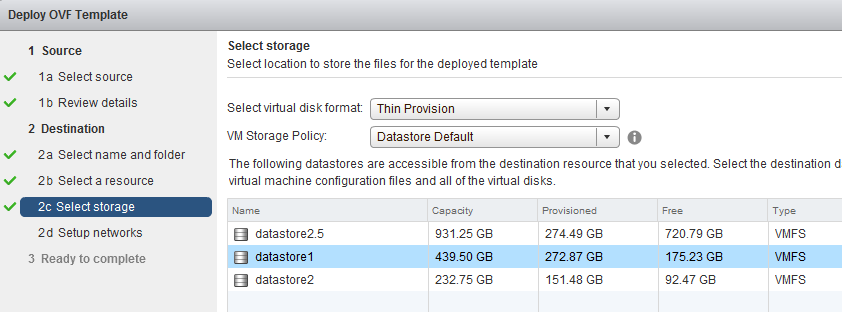
Choose your storage and provisioning scheme. I will be selecting Thin Provision since I’m low on space on my home lab but you can choose one of the Thick Provisioning schemes for better performance.
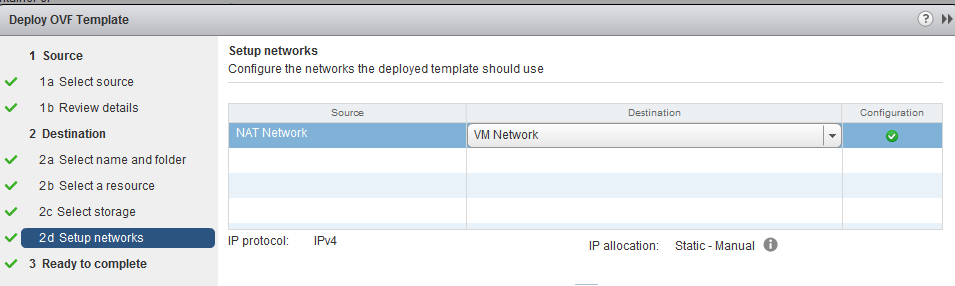
I will be using the my default home network.
Review final settings. Than click Finish.

OpenVPN Appliance Initial Configuration
Once the OpenVPN appliance has been deployed, turn on the VM

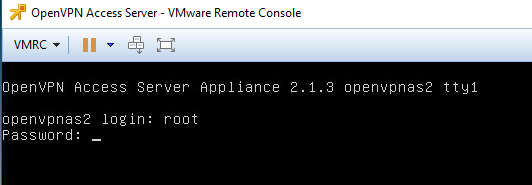
Log into the OpenVPN console. The default username is root. The default password is openvpnas. Be sure to change username and password afterwards.
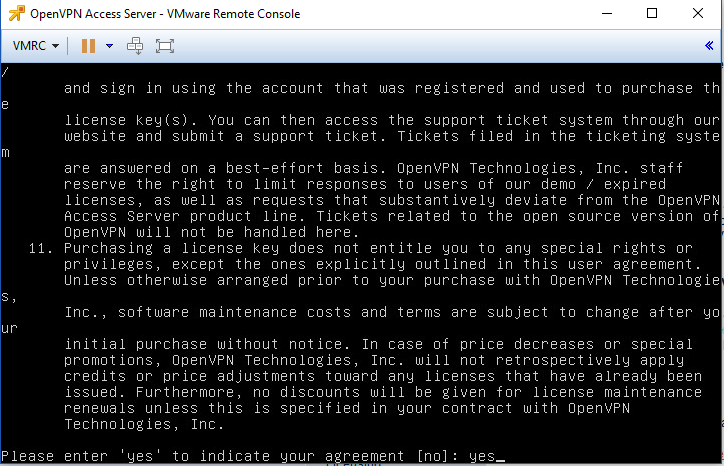
First thing is to agree to the EULA. Type yes and press enter.
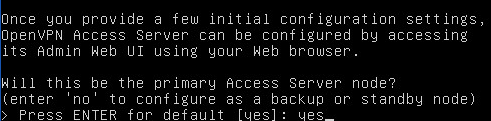
Since this is the first and only OpenVPN server. Type yes and press enter.
Next specify the network interface where the OpenVPN server will listen for Admin WEB UI requests. Press enter to use the default.

Specify the port number. The default is 943 which is what we will also use here. Press enter to use the default.
![]()
Next specify the port clients will use to connect to the VPN server. By default this is port 443 but you can set it to a different port such as 4443 if you prefer. You will need to configure the port to be forwarded to the internet if OpenVPN server is behind a NAT based router like it usually is for most home VPN setups. Press enter to use the default
![]()

Choose yes when prompted if client traffic should be routed by default through the VPN.

Choose yes when prompted if DNS traffic should be routed by default through the VPN.
![]()
For the next option, it will ask if we should use local authentication via internal DB. Type yes and press enter. What will happen now is we will configure some user accounts later that will be used to logon to the VPN when we connect using the client later. Radius and LDAP can be configured later if you employ Active Directory but we will keep it simple for now.
![]()
Next we will specify if private subnets should be accessible to clients by default. Because we are routing all client traffic through the VPN, it doesn’t matter what we pick here. Press enter for the default.
![]()
Press enter to login to the Admin UI as default user account openvpn.
![]()
You’ll be prompted to specify your OpenVPN license key. Leave it blank to use the Free License and press enter.
![]()
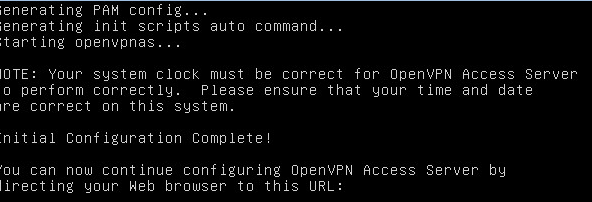
Your configuration selections will be applied.
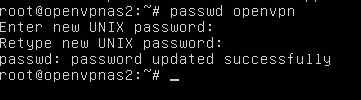
Before you can login to the Admin UI, configure a password for the openvpn user account by using command passwd openvpn.
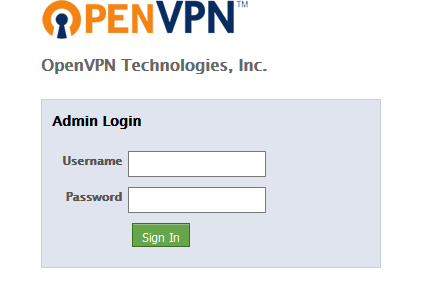
Log into the Admin UI with the address: https://ipaddressofappliance:943/admin. Use the openvpn username and password you just configured.
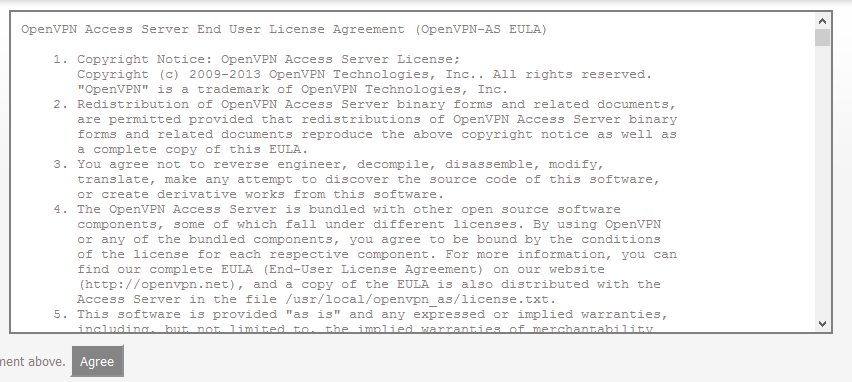
Agree to the EULA
Add a few vpn users. Navigate to User Management>User Permissions. You will be prompted for credentials when you logon to your VPN via the OpenVPN client.
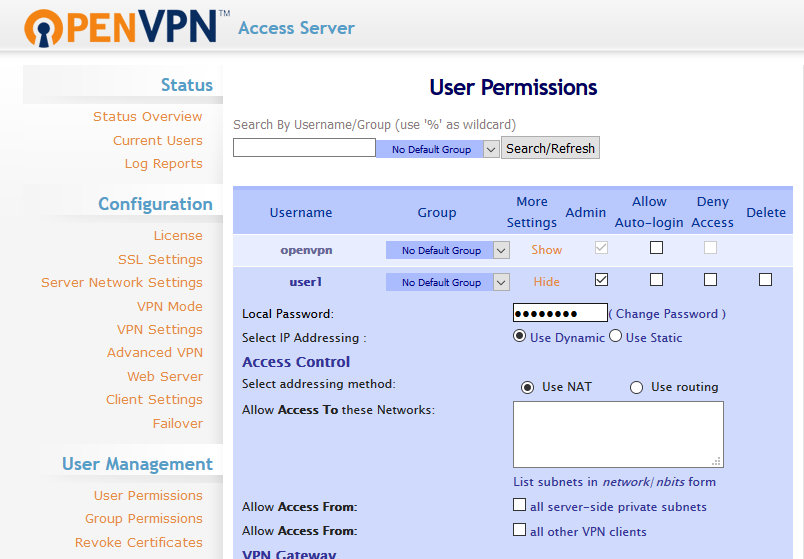
Save you settings when finished.
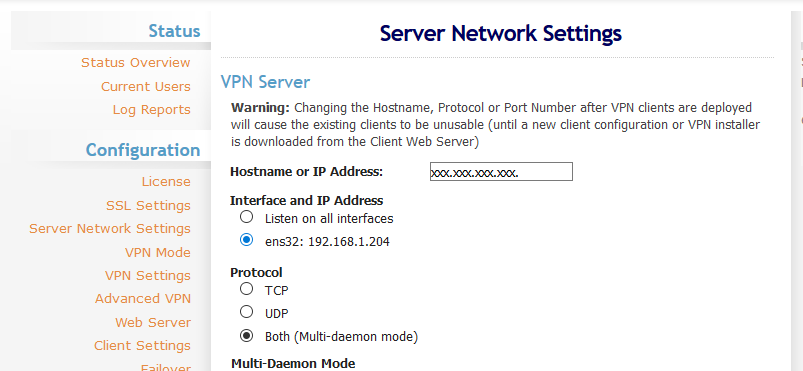
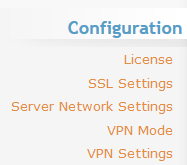
Navigate to Configuration>Server Network Settings. Fill in the Hostname or IP Address field with your external IP or DNS address. Save your settings when finished.
Navigate to Configuration>VPN Settings
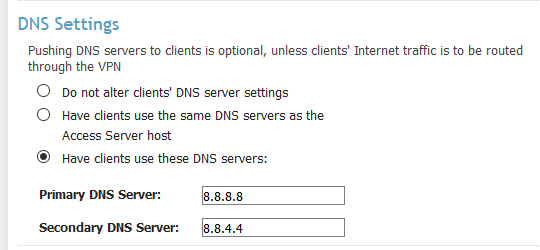
Go down to the DNS Settings section. Click Have clients use these DNS servers and enter 8.8.8.8 and 8.8.4.4 for Primary and Secondary. This is so that when you connect to you VPN you have internet access.
At this point, logon to your gateway or home router and configure port forwarding to point 443 or 4443 to the ip address of the OpenVPN server. There are many tutorials on how to do this online and the steps will differ slightly depending on what kind of router you use so we won’t be covering those steps here. Once port forwarding has been setup, logon to your OpenVPN server by typing https://yourpublicip in a browser.
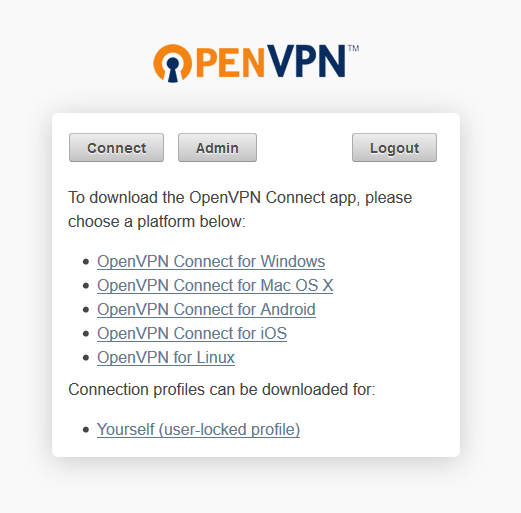
Select the appropriate Connect client and install.
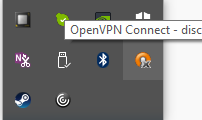
Once installed, navigate to your tray. Find the OpenVPN tray icon and right-click it.
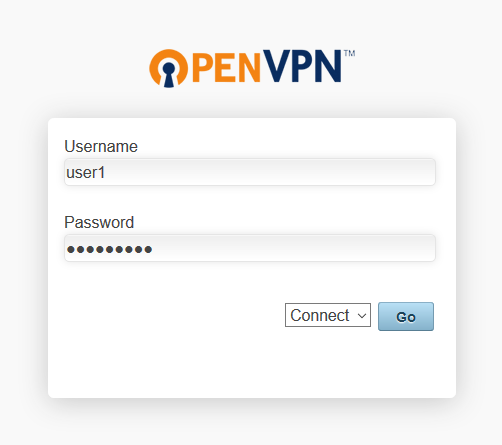
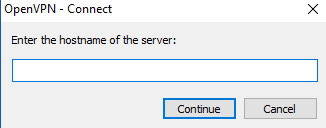
Choose Connect. Enter the hostname of your VPN server when prompted. This can be the public IP or a DNS name if you have one.
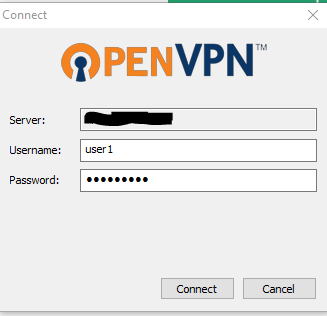
Enter username and password.
Test your VPN afterwards.

If traveling abroad and you want to share your VPN connection with your other devices, you can use 3rd party tools such as Virtual Router (https://virtualrouter.codeplex.com/) to share the connection and turn your laptop or other device into a makeshift wireless router.
References:
- https://openvpn.net/index.php/access-server/download-openvpn-as-vm/202.html?osfamily=Virtual%20Appliance%20Windows%20(VHD)&ex=1